Einleitung

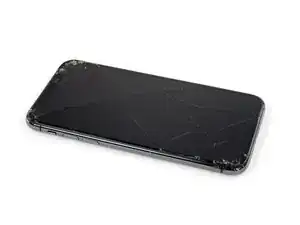
Nur eine grundständige Anleitung zum Öffnen des iPhone X, um Zugang zu internen Bauteilen für Reparatur und Austausch zu gewinnen.

  1. Whblnhy2uvYmFjIL
    Whblnhy2uvYmFjIL
    4URQtwUtqSQUKdHH
    NgjPkqJtEMhTXkd3
    • Wenn die Glasscheibe des Displays an deinem iPhone zerbrochen ist, überklebe sie mit geeignetem Klebeband, um weitere Brüche und Verletzungen während der Reparatur zu vermeiden.

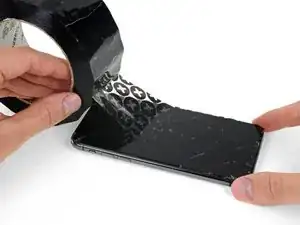
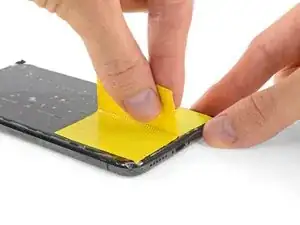
    • Überdecke die Glasscheibe des Displays komplett mit überlappenden Streifen von durchsichtigem Paketband.

    • Trage eine Schutzbrille, um deine Augen vor Glassplittern zu schützen.

    • Wenn das Glas so stark zerbrochen ist, dass der Saugheber in den nächsten Schritten nicht gut haftet, dann versuche ein starkes Klebeband ("Panzerband") zu einem Griff zu falten und so auf die Scheibe zu kleben, dass du sie damit hochziehen kannst.

    • Wenn das alles nicht hilft, dann klebe den Saugheber mit Sekundenkleber am Display fest.

  2. aaO4KYlBJShASHjk
    aaO4KYlBJShASHjk
    1r6VLlUjodppndSN
    BMhMJ35CLUOmyNqB
    • Wir haben die Anti-Clamp entwickelt, um das Öffnen von Geräten zu erleichtern. Die nächsten drei Schritte zeigen, wie sie verwendet wird. Wenn du sie nicht benutzen willst, überspringe die nächsten drei Schritte und folge einer anderen Methode.

    • Genaue Anweisungen für die Anti-Clamp findest du hier.

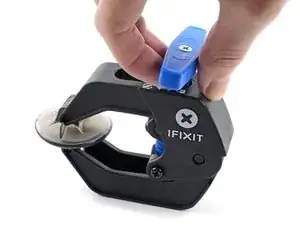
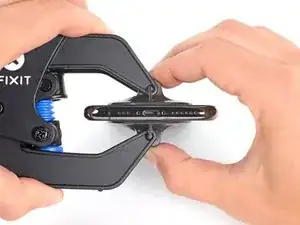
    • Drücke den blauen Griff zurück, damit die Arme der Anti-Clamp frei beweglich werden.

    • Schiebe die Arme entweder über die linke oder die rechte Kante des iPhones.

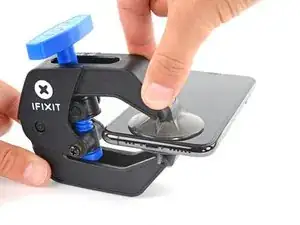
    • Bringe die Saugheber nahe an der Unterkante des Displays an, einen auf der Vorderseite, den anderen auf der Rückseite.

    • Drücke die Saugheber zusammen, so dass sie auf den Oberflächen haften.

    • Wenn die Saugheber nicht gut auf den Oberflächen des iPhones haften, dann kannst du Klebeband verwenden, um eine griffigere Oberfläche zu schaffen.

  3. fm1Txb6ZWoZVRccg
    fm1Txb6ZWoZVRccg
    ASYBeEfJh2IqKXlL
    qYIoimNJqUrEuJAT
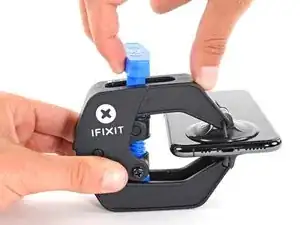
    • Drücke den blauen Griff vorwärts, um die Arme wieder zu verriegeln.

    • Drehe den Griff eine volle Umdrehung im Uhrzeigersinn, oder bis du merkst, dass sich die Saugheber dehnen.

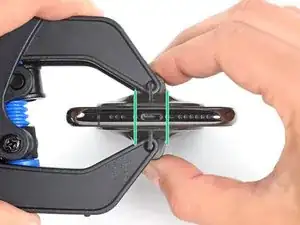
    • Achte darauf, dass sich die Saugheber weiterhin gegenüber stehen. Wenn sie sich nicht mehr gegenüber stehen, dann löse die Saugheber ein wenig ab und schiebe sie in die richtige Position.

  4. fqtITHlwZLOFLmTY
    fqtITHlwZLOFLmTY
    321YFxdKNFRFVwk3
    YctteqQxMcE3kxyP
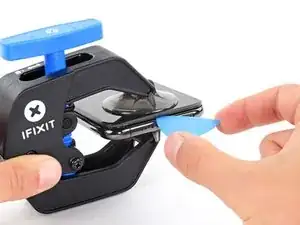
    • Führe einen erwärmten iOpener durch die Arme der Anti-Clamp.

    • Du kannst den Kleber auch mit einem Haartrockner oder einem Heißluftgebläse aufweichen. Sei aber vorsichtig, zu viel Hitze kann das Display und/oder den Akku beschädigen.

    • Forme den iOpener so, dass er auf der Unterkante des iPhones liegt.

    • Warte eine Minute, damit sich der Kleber lösen und ein Spalt entstehen kann.

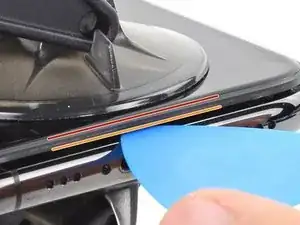
    • Setze ein Plektrum in den Spalt unter das Display und der Kunstoffblende ein, nicht unter das Display selbst.

    • Wenn es nicht gelingt, mit der Anti-Clamp einen ausreichend großen Spalt zu erzeugen, dann erwärme die Stelle nochmals und drehe den Griff eine viertel Umdrehung im Uhrzeigersinn weiter.

    • Drehe den Griff jeweils nicht mehr als eine viertel Umdrehung weiter und warte jedes Mal eine Minute lang. Gib der Anti-Clamp Zeit, ihre Arbeit zu erledigen.

    • Überspringe die nächsten drei Schritte.

    DO NOT separate the glass from the plastic bumper or rim around it. These instructions don't clarify that the pick has to be inserted between the plastic rim and the metal body. It is likely that the glass will lift slightly off the plastic surround before the plastic will lift out of the metal body. I had success sliding a card or pick back and forth along the bottom edge of the plastic rim while pulling on the suction cup. Eventually there was a space large enough for the pick to go under the plastic rim.

    Anessa -

    Thanks for pointing this out! I'll revise this step to clarify this point.

    Arthur Shi -

  5. JYhTvDYuGLQw3jiI
    • Das Öffnen des iPhones wird leichter, wenn du seine Unterkante erwärmst und damit den Kleber darunter aufweichst.

    • Benutze einen Haartrockner oder ein Heißluftgebläse oder bereite unseren iOpener vor. Erwärme damit die Unterkante des iPhones etwa eine Minute lang, um den Kleber darunter aufzuweichen.

    General tip regarding heating necessary to remove adhesive:

    consider using a heated tip of a small screwdriver or metal spudger (not the one made of plastic, provided in kit), rather than to heat the device itself.

    Uri -

    You then need to be careful about the temp of the tool which if hot enough can melt plastic components or harm them. Keeping the heat source (heat gun) far enough away from the object that you’ll eventually melt the glue but would be much harder to melt components. I try to keep 4” or 5” gap between the source & object

    Sandman619 -

    Thanks for the info. Could a air convector do the job

    dominique.br -

    When opening a device that has previously been worked on, and on which the adhesive might not have been replaced, be extremely carful when opening the phone. It will open much more easily than expected. If you’re not careful you might rip a cable.

    jonpol -

    Is this tool required or can I just use the Anti-Clamp by itself.

    Mikail -

    If you have a 3d printer, heat the bed to 80c and put the phone screen side down on it for 30 secs

    philip.joseph123 -

  6. qXGGZ2MpZIYeQjKI
    qXGGZ2MpZIYeQjKI
    tGDwxj5neYkh3MDh
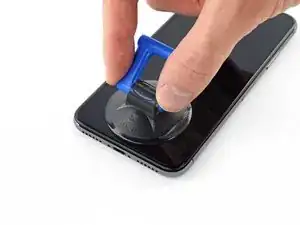
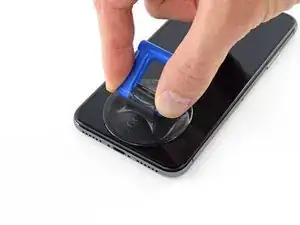
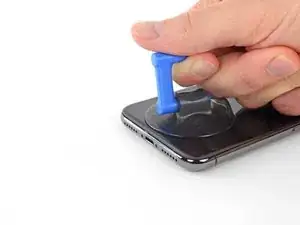
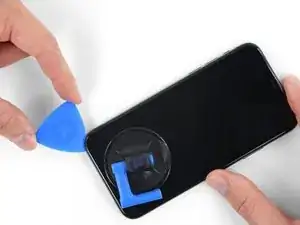
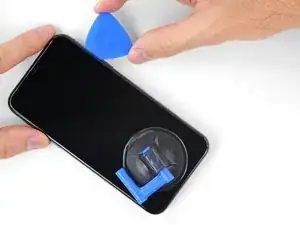
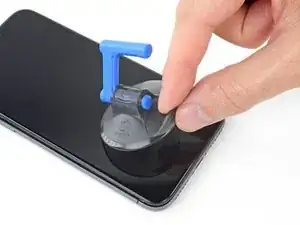
    • Wenn du einen einzelnen Saugheber benutzt, dann setze ihn am unteren Rand des iPhone auf, wobei du den gebogenen Teil vermeiden musst.

    If you were using some form of screen protector, it may come off first as soon as you pull on the suction cup. Do not be alarmed. That is normal behavior.

    Alain-Daniel Wa-Baguma -

    3m VSB double stick tape will stick to the screen when the suction cups fail (see my comment on step 1)

    Tawan Khamapirad -

  7. uTXCGQFa5j4E5T3Y
    uTXCGQFa5j4E5T3Y
    DWfsuj4RCooAtKRa
    Zw4PcEZSTKHaLcqq
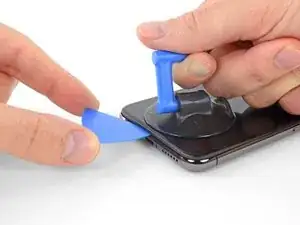
    • Ziehe fest und gleichmäßig am Saugheber und erzeuge dadurch einen kleinen Spalt zwischen Display und Rahmen.

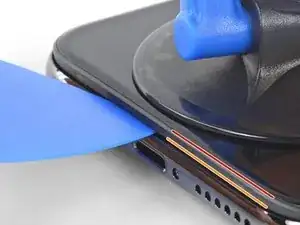
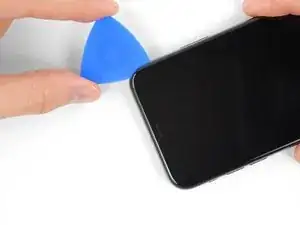
    • Setze ein Plektrum in den Spalt unter der Kunstoffblende am Display ein, nicht am Display selbst.

    • Der wasserfeste Kleber, der das Display festhält, ist sehr stark. Um den anfänglichen Spalt zu erzeugen, musst du recht viel Kraft aufbringen. Wenn der Spalt schwer zu öffnen ist, musst du mehr Wärme anwenden. Bewege die Scheibe vorsichtig hoch und runter und löse so den Klebstoff, bis der Spalt groß genug ist, um das Werkzeug einzusetzen.

    In addition to safety goggles, I would recommend you also wear good gloves to avoid getting cut with the glass as you try to pry it open.

    Alain-Daniel Wa-Baguma -

    The top about applying more heat and gently rocking the screen up and down to weaken the adhesive did the trick for me. Thank you!

    Monil Shah -

    There needs to be more clarity on where to shove the opening pick into. There is actually two openings that the pry tool can be forced into: one below the black plastic bezel, and one above the black plastic bezel. When I heated my screen with a warming pad and pulled up the suction cup, it actually pried apart above the black plastic bezel which removed the touch screen from the display panel. With this being the first newer iPhone I'd opened since the 3GS, I didn't realize that I was opening the wrong opening as the directions only mentioned one opening and did not warn of this. I was pretty disappointed in the lack of mentioning this, as I was taking my time and following it to the tee. As a result, it destroyed my original iPhone screen.

    Caleb Davison -

    DO NOT separate the glass from the plastic bumper or rim around it. As someone else noted, these instructions don't clarify that the pick has to be inserted between the plastic rim and the metal body of the phone. When pulling upwards with the suction cup, it is likely that the glass will lift slightly off the plastic surround before the plastic will lift out of the metal body. I had success sliding a card or pick back and forth along the bottom edge of the plastic rim while pulling on the suction cup. Eventually there was a space large enough for the pick to go under the plastic rim.

    Anessa -

    Thank you for pointing this out! I've updated the step to reflect this.

    Arthur Shi -

  8. QE4lOUoglbyWQUwm
    QE4lOUoglbyWQUwm
    cHHBBJPBr4bVv24U
    agDTTsHWFYyI2WBC
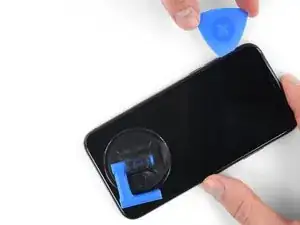
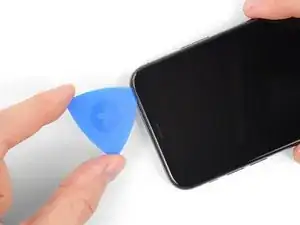
    • Schiebe das Plektrum um die linke untere Ecke und am linken Rand des iPhone hoch, zerschneide damit den Kleber, der das Display festhält.

    • Setze das Plektrum nicht tiefer als 3 mm in das iPhone ein, damit du keine internen Bauteile beschädigst.

  9. mkLvBfvMoYsfQbGS
    • An der rechten Kante des iPhones verlaufen empfindliche Kabel. Setze an diesen Stellen kein Plektrum ein, du könntest sonst die Kabel beschädigen.

  10. OEUEsoSAmOAWxAMR
    OEUEsoSAmOAWxAMR
    YOhTValkxrevLipu
    aSZ2MAdtw4ZImiCD
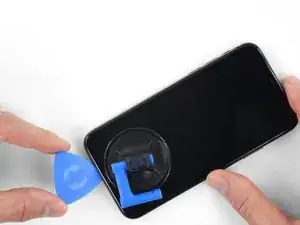
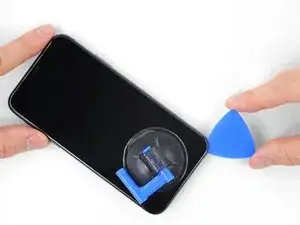
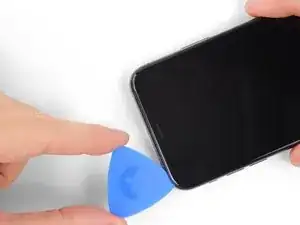
    • Setze da Plektrum wieder an der Unterkante des iPhone ein und schiebe es die rechte Seite hoch, um den Kleber darunter aufzutrennen.

    • Schiebe das Plektrum nicht tiefer als 3 mm ein, du könntest sonst die Displaykabel beschädigen.

    If you have flat feeler gauges (for adjusting engine valve tappet clearance, ignition points … old school) the .003” thick gauge goes right in. Work your way up in thickness until you can get the pic or supplied pry tool in. Don’t insert metal feeler gauge in too far, just enough to hold crack open. I didn’t need to use the suction cup. I used a hot/cold gel pack heated in microwave to heat edges to soften glue a bit. Made sure it wasn’t so hot I couldn’t stand it on my skin.

    William Olstad -

  11. WfcjjEBfMZqEySEf
    WfcjjEBfMZqEySEf
    PCXKpWMWg6GWEViY
    McqYslJ4vV1SOOnm
    • Die Oberkante des Displays ist mit Klebstoff und mit Klammern befestigt.

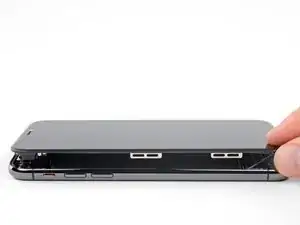
    • Schiebe das Plektrum um die obere Ecke des Displays herum und ziehe gleichzeitig vorsichtig das Display mit wackelnden Bewegungen herunter in Richtung des Lightninganschlusses.

    • Wenn du nicht vorsichtig bist, können die Klammern brechen. Sei geduldig und wende nicht zu viel Kraft an.

    • Setze auch hier das Plektrum nicht tiefer als 3 mm ein, sonst beschädigst du möglicherweise die Sensorgruppe des Front Panels.

    • Schiebe das Plektrum zur gegenüberliegenden Ecke und trenne die restlichen Klebeverbindungen, welche das Display noch befestigen.

    These are the best instructions I’ve ever read for anything.! Thank you!

    Peter Andrew -

  12. GnieimxVeXdJJobM
    • Ziehe an der kleinen Noppe am Saugheber, um ihn vom Display zu entfernen.

  13. XFu5RLJA6ncMAhxo
    XFu5RLJA6ncMAhxo
    nCGOAuVQLFmYsrOd
    XjQSuyqDe1k51mua
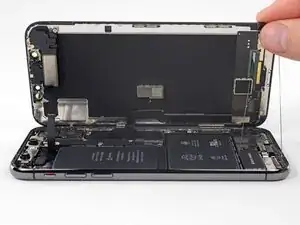
    • Öffne das iPhone, indem du das Display von der linken Seite her hochklappst, wie die Seite eines Buches.

    • Versuche noch nicht, das Display ganz zu trennen, mehrere empfindliche Flachbandkabel verbinden es immer noch mit dem Logic Board des iPhones.

    • Achte darauf, dass der Rahmen wie gezeigt zusammen mit dem Display herauskommt und nicht im Gerät steckenbleibt.

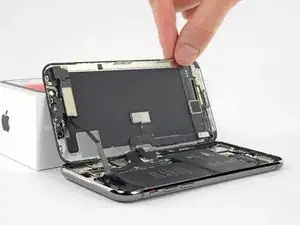
    • Lehne das Display gegen einen Gegenstand, damit es abgestützt ist, wenn du daran arbeitest.

    • Lege das Display beim Zusammenbau richtig in Position, richte die Klammern an der Oberkante aus und drücke die Oberkante hinein, bevor du den Rest des Displays einrasten lässt. Wenn es nicht leicht einrastet, dann prüfe, ob die Klammern am Rand des Displays ringsum richtig sitzen und achte darauf, dass sie nicht verbogen sind.

    My phone came apart in a different way and looks not right the little box at the top of the display as actually bolted to the top of the frame body I think something went really wrong when I opened it.

    Mike Kostersitz -

    It opens like a book but be careful not to open it all the way — only as far as shown in the photo. Otherwise it will strain the thin cable that connects the sensor module and then no more FaceID for you (or, as it turns out me). This could have been made more explicit in the instructions.

    Richard Tucker -

    It opens like a book but be careful not to open it all the way  … the small stainless steel tabs that hold the screen around the metal frame, that are on the bend place (right side of the phone)… are tend to bend, you can straighten them back to 90 deg. but the plastic base that they are on? very fragile- watch out not to break the plastic bezel … it may come apart of the glass.

    dabur872 -

    Advice for re-assembly: Before closing up the phone with the seal, check if phone is powering up again and speaker, mic and sensors are still working. If done this check even before installing the board connector bracket in Step 13.

    Alexander Nowak -

Abschluss

Um dein Gerät wieder zusammenzusetzen, folge den Schritten in umgekehrter Reihenfolge.

Jeff Suovanen

Mitglied seit: 06/08/13

413365 Reputation

0 Kommentare