Einleitung

Wenn dein Epson ET-2760-Drucker keine vollständigen Zeilen druckt und Probleme beim Drucken eines Vollfarbbildes hat, kannst du mit diesem Verfahren den Druckkopf manuell reinigen.

Der Druckkopf liefert und überträgt die Tinte auf das Papier in der richtigen Form für das, was gedruckt werden soll. Bevor du anfängst, solltest du daher eine Druckkopfreinigung durchführen, um zu überprüfen, ob das Problem manuell behoben werden muss. Von hier aus kann die Anleitung mit den folgenden Schritten gestartet werden.

Alle folgenden Schritte sind einfach durchzuführen und erfordern keine Vorkenntnisse. Es besteht jedoch die Möglichkeit, dass Tinte auf deine Hände und deine Kleidung gelangt, daher solltest du nicht unbedingt dein Lieblingsshirt tragen!

  1. lOUfZgEwgIROKtJh
    lOUfZgEwgIROKtJh
    OcbYjNcWLeIxsGqI
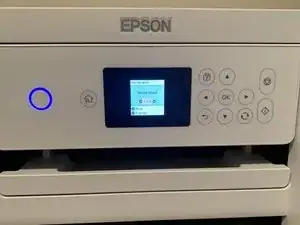
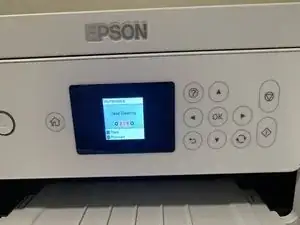
    • Fange mit einem beliebigen Druck oder einer Düsenprüfung an.

    • Wenn der Druckvorgang begonnen hat, ziehe das Netzkabel mitten im Druckvorgang heraus.

  2. eZsJD224OlbYusow
    eZsJD224OlbYusow
    UmbiUB5Sm1HrJd2l
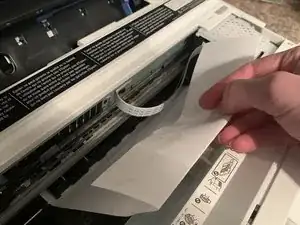
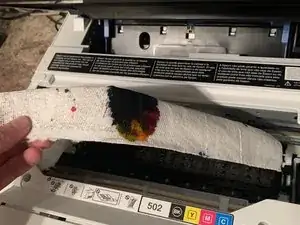
    • Öffne den Drucker, und ziehe das halb bedruckte Papier durch den Schlitz heraus.

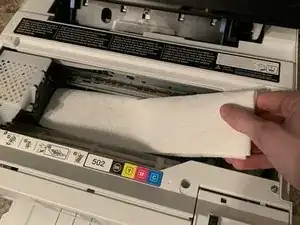
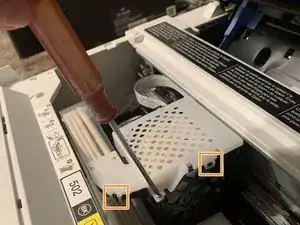
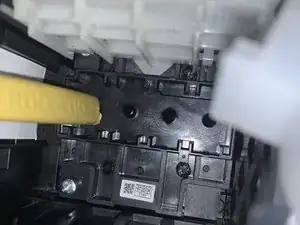
    • Lege ein dickes Küchenpapier oder einen Lappen unter den Druckkopf.

    Place a thick paper towel or rag under the printhead?

    Assuming the printhead is now freely moveable at this point, DO we first push it to the rightmost docking position THEN place a paper towel? or to the leftmost position as picture indicates?

    Genesis Amadeus -

    Place a thick paper towel or rag under the printhead?

    Assuming the printhead is now freely moveable at this point, DO we first push it to the rightmost docking position THEN place a paper towel? or to the leftmost position as picture indicates?

    Genesis Amadeus -

    If you pulled the power cord mid-print, the printhead should move fairly freely. DO NOT FORCE IT.

    Place a paper towel under the printhead and slide one edge of the paper towel to an outer edge of the printhead. As you progress through this, you will want to move the printhead to a cleaner part of the paper towel.

    drgnrider12 -

    Porqué se introduce un papel y se desconecta a mitad de la impresión y luego se casa completo?

    Mayra Cartagena -

  3. JyluUMBESODUXnvR
    JyluUMBESODUXnvR
    JRvMHVHiuRfGBVxP
    ueBVFwBnxtCLUWMX
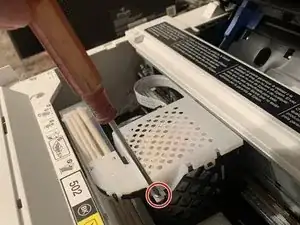
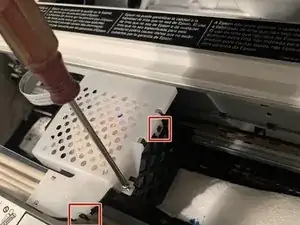
    • Entferne die einzelne Schraube mit einem Kreuzschlitzschraubendreher #0.

    • Löse die beiden weißen Kunststoffclips.

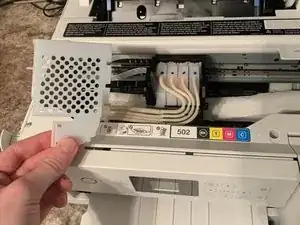
    • Hebe die obere Abdeckung vom Druckkopf ab.

    You also have to unclip that long clear plastic peace of the side. Note were it will need to be reclipped in. It will hang there to the left while you work.

    Donna Hinkley -

  4. HJpYjJeIkVidtZYO
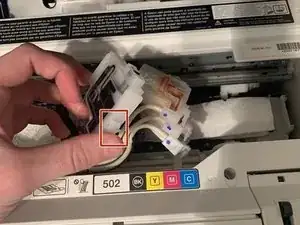
    • Löse die vier Tintenpatronen vom Druckkopf, indem du an den kleinen Laschen auf der Oberseite der Patronen ziehst.

    • Achte darauf, dass die Tintenschläuche nicht von den Patronen getrennt werden. Lege die angeschlossenen Patronen einfach neben den Druckkopf.

    Are the cartridges that are being unclipped supposed to look empty?

    Victoria Berrie -

  5. amfRctAbuBgmlFXg
    amfRctAbuBgmlFXg
    IkhO4RQXcWEhDRdx
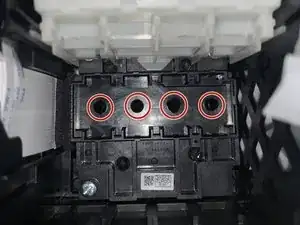
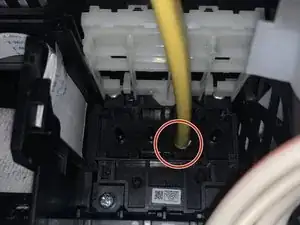
    • Fülle eine Spritze mit Druckkopfreinigungslösung und setze die Spitze der Spritze auf die von den Patronen hinterlassenen Löcher.

    Use the little hose that comes with your printhead cleaning solution.

    Donna Hinkley -

  6. l2UCTEdjYvClCqG4
    • Beginne damit, die vom Hersteller empfohlene Menge der Lösung durch jedes Loch auf das Papiertuch zu spülen.

    • Wechsle gegebenenfalls das Küchentuch zwischen den Spülvorgängen aus, damit keine Lösung in den Drucker gelangt.

    Pull the cleaning solution into the syringe thru the tube. Place other end of the tube securely over the print head.

    Donna Hinkley -

    where can we get the cleaning solution? (brand name) as well as what size tube?

    Lizzy70 -

  7. PwjJSKNXcGEZpFM4
    • Hole das Küchentuch unter dem Druckkopf heraus.

    Takes about 1/2 paper towel per color. Each color took about 3 mil to flush.

    Donna Hinkley -

  8. YTUXNV6YRB1FxjI2
    YTUXNV6YRB1FxjI2
    3oJrZxfYkJ146fp4
    u5EdPb3GuIMKyGgk
    • Setze die Tintenpatronen wieder in ihren ursprünglichen Positionen ein.

    • Bringe die beiden Clips der Druckkopfabdeckung wieder am Druckkopf an.

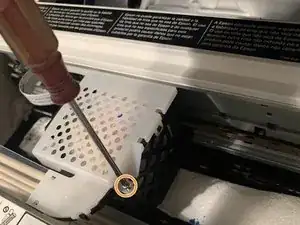
    • Schraube die einzelne Schraube wieder mit einem Kreuzschlitzschraubendreher #0 fest.

    Reclipping everything is the hardest part. Be super careful reattaching screw. The holding is fragile.

    Donna Hinkley -

  9. Q1fZN2B5nZp4FUtv
    • Führe eine automatische Reinigung durch, um sicherzustellen, dass alle Tintenrückstände entfernt werden.

    The cleaning solution linked by this article, the seller specifically says "Sorry, this printhead solution cannot be used for Epson ecotank." July 14, 2022.

    drgnrider12 -

    Thank you for your time and efforts

    Richard Goodwin -

    Le he dado 3 head cleaning y la misma cantidad de nozzle check y no ha imprimido nada, segui cada paso según la explicación, es que tengo que esperar algún tiempo luego de la limpieza de los cabezales con el Printhead cleaning kit?

    Mayra Cartagena -

    How would I clean my rollers or can they be replaced they're leaving Pizza wheel marks I've tried cleaning them

    Bev ALCHORN -

    The plasic cover of the tubes is cut and off. Does this effect my printer? How do I fix or get a replacement? Thanks in advance!

    Y Shane -

Abschluss

Genieße deinen sauberen Druckkopf!

Jack Buttry

Mitglied seit: 27/02/22

361 Reputation

14 Kommentare

Simple but to the point tutorial that detailed every step including the tools and supplies needed. Photos helped tremendously too. Thank you.

Mark DiRollo -

Where do I find out the "manufacturer's recommended amount of solution" per flush?

Stelios Makrinos -

Usually it's 5ml

Casper Hon -

But it seems that ink isn't even getting to my yellow and blue heads. At least, the test print shows no yellow or blue at all.

How can I get at the exit (valves?) on the ink storage tanks to make sure they're clear -- without breaking the printer?

Thanks!

warble58 -

Me too! No yellow or blue coming through.

Tracy -

I sent a colored page to the printer, it gave me all shades of blue, no yellow, black or magenta. A nozzle check, and print head cleaning gave me black & yellow, 5 days later I have black, yellow & magenta. No blue. IF I get power back tomorrow I’ll be manually cleaning the print head.

Lynn -

Same problem with no Yellow or Blue; cleaning did no help. POWER CLEANING once did the trick.. Thank you for the instructions especially the pictures. Printer was just out of warranty (one year warranty) and only a little over 500 printed sheets when it suddenly failed. Must remember to run a full color print at least once a week ro keep from drying out the heads as I was doing mostly B&W. Ken

Ken -

The most important thing to know is what ID dia in inches is required for the hose?

Jami FIT -

No yellow or blue, I’ve flushed the print heads twice. Any suggestions appreciated

Sandra Jo Stevenson (Sandy) -

I did this and then printed out the test sheet a couple times..... Then my printer completely shut down and now won't come back online..... Tried a new power cord.... Nothing. Help!

Cindy Rotermund -

I did the same thing, did yours ever turn back on?

Whitney Sheridan -

Great pictures and general description. I did add some notes to make it easier for future users. I did flush my magenta twice, as that was the clogged color. After back together, I did a pin head test, followed by a pin head clean, then another test and it looks great!

Donna Hinkley -

The guide is great but it seems likely that the author hasn't actually identified a problem with the yellow.

Looking at the pictures it seems there's very little ink in the ink buffer (the white block that replace the cartridges and feed the printhead). Each of those needs to be at least half full with ink otherwise the printhead is likely to be receiving air instead of ink and producing results that look like a clog when the reality is that the buffers aren't primed properly with enough ink to delivery it.

For reference look at the picture in Step 4 and note the difference in buffer ink levels between the black and the yellow. The black is about right, the yellow is almost empty.

Hope that helps for some of you who are reporting that you aren't getting ink through.

Martin Smallridge -

How do you resolve the problem of not enough ink in the ink buffer? Does that mean there's some kind of clog in the line?

Kentucky_Tim -