Einleitung
Diese Anleitung wurde von iFixit-Mitarbeiter:innen verfasst und ist keine offizielle Reparaturanleitung von Google. Hier erfährst du mehr über unsere Qualitätsstandards.
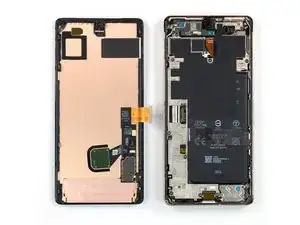
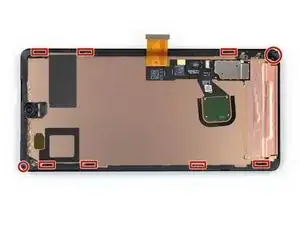
Diese Anleitung zeigt, wie ein defektes Display im Google Pixel 7 Pro ausgetauscht werden kann.
Bevor du dein Handy auseinanderbaust, achte darauf, dass der Akku auf unter 25 % entladen ist. Das verringert das Risiko, dass sich der Akku entzündet oder sogar explodiert, falls er während der Reparation versehentlich beschädigt wird. Wenn dein Akku aufgebläht ist, musst du entsprechende Vorsichtsmaßnahmen treffen.
Achtung: Das Pixel 7 Pro enthält Laser der Klasse 1. Wenn du es auseinandernimmst, könntest du unsichtbarer Infrarotstrahlung ausgesetzt sein.
Dein Ersatzdisplay ist mit einem neuen Fingerabdrucksensor ausgestattet. Wenn er nicht vorhanden ist, musst du den bisherigen Fingerabdrucksensor auf das neue Display übertragen und ihn danach neu kalibrieren, sonst funktioniert er nicht richtig.
Ob dein Gerät nach der Reparatur noch wasserdicht ist, hängt davon ab, wie gut du es beim Zusammenbau versiegelst. Die IP-Zertifizierung wirst du jedoch verlieren.
Um die Reparatur abzuschließen, wirst du Ersatzklebestreifen benötigen.
Werkzeuge
-
-
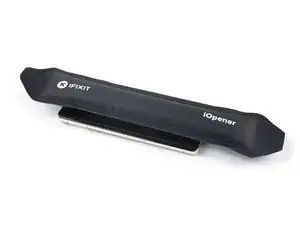
Lege einen erwärmten iOpener zum Lösen des Klebers mindestens drei Minuten lang auf das Display.
-
-
-
Achte darauf, dass du die Plektren an den richtigen Stellen einsetzt, damit sich das Display nicht vom Schutzrahmen, sondern vom Smartphone ablöst.
-
Rund um das Display gibt es verschiedene Rasten. Wenn dein Plektrum während des Displayausbaus stecken bleibt, hast du es wahrscheinlich zu tief in das Display eingeschoben.
-
-
-
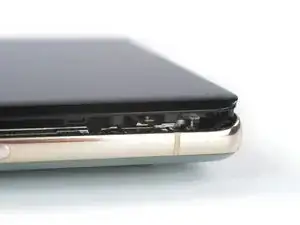
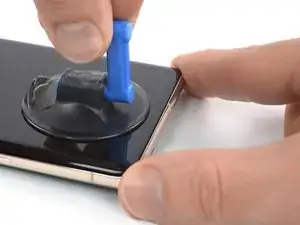
Wenn sich das Display warm anfühlt, dann bringe einen Saugheber am unteren Displayrand an.
-
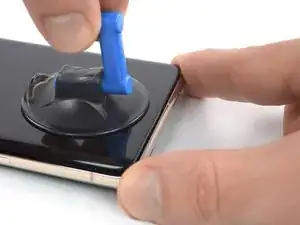
Hebe das Display zusammen mit dem Schutzrahmen mithilfe des Saughebers hoch, bis ein kleiner Spalt zwischen dem Display und dem restlichen Smartphone entstanden ist.
-
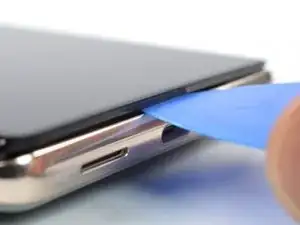
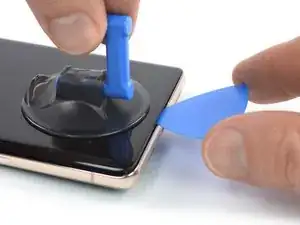
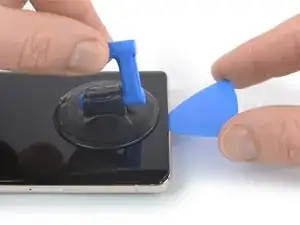
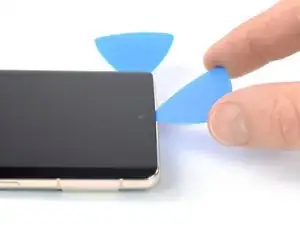
Setze ein Plektrum in den Spalt ein.
-
-
-
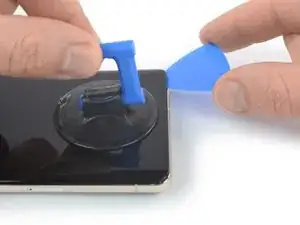
Schiebe das Plektrum zum Auftrennen des Klebers zur unteren rechten Displayecke hin.
-
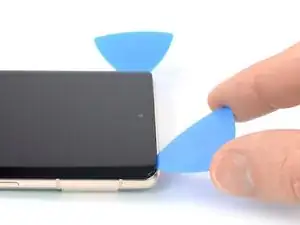
Lasse das Plektrum stecken, damit sich der Kleber nicht wieder verbinden kann.
-
-
-
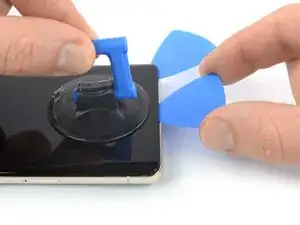
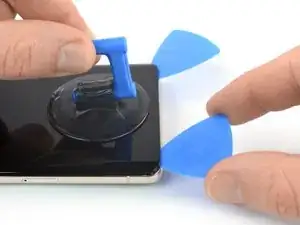
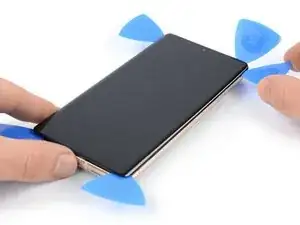
Setze ein zweites Plektrum an der Unterkante ein und schiebe es zum Auftrennen des Klebers zur unteren linken Displayecke hin.
-
Lasse das Plektrum stecken, damit sich der Kleber nicht wieder verbinden kann.
-
-
-
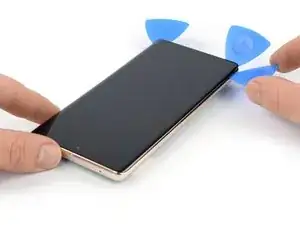
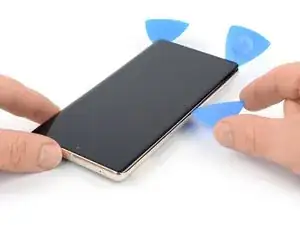
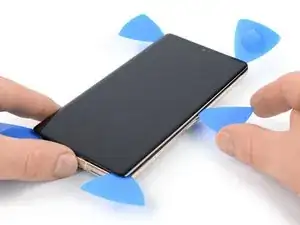
Setze ein drittes Plektrum unter die linke untere Displayecke ein.
-
Schiebe das Plektrum zum Auftrennen des Klebers und Lösen der Rasten an der linken Displaykante entlang .
-
Lasse das Plektrum in der linken oberen Displayecke stecken, damit sich der Kleber nicht wieder verbinden kann.
-
-
-
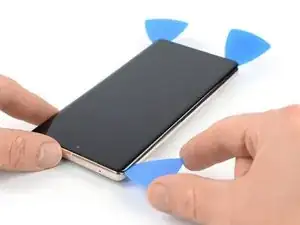
Setze ein viertes Plektrum in die obere linke Ecke des Displays ein.
-
Schiebe das Plektrum zum Auftrennen des Klebers an der Oberkante entlang.
-
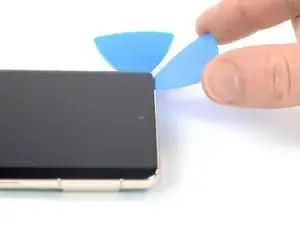
Lasse das Plektrum in der oberen rechten Ecke stecken, damit sich der Kleber nicht wieder verbinden kann.
-
-
-
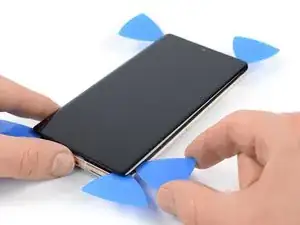
Setze ein fünftes Plektrum in die rechte Displaykante ein. Schiebe es unter der rechten Kante zum Auftrennen des restlichen Klebers und Lösen der Rasten an der rechten Kante entlang.
-
-
-
Klappe das Smartphone behutsam wie ein Buch von der rechten Displayseite her nach links auf.
-
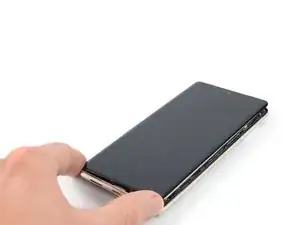
Lege das Display mit dem Bildschirm nach unten parallel zum Rahmen ab, bevor du fortfährst.
-
-
-
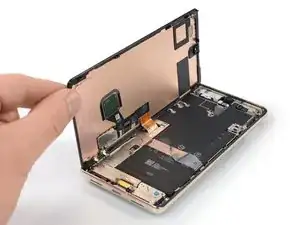
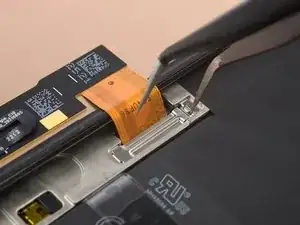
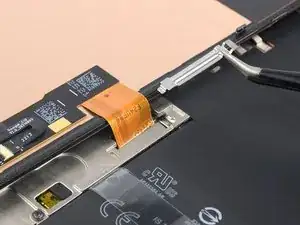
Setze eine Pinzette mit einer Spitze in die Öffnung am oberen Ende der Displaykabelhalterung ein.
-
Drücke die Pinzette nach innen, heble nach oben und löse die Halterung ab.
-
-
-
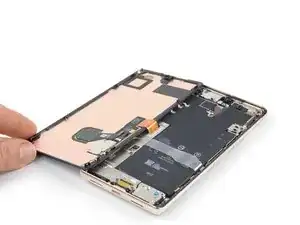
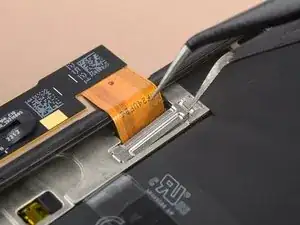
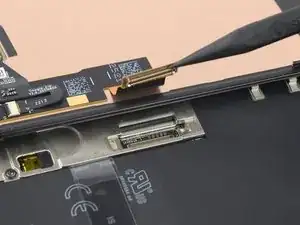
Ziehe die Displaykabelhalterung mit einer Pinzette unter dem Mittelrahmen heraus in Richtung der Kameras und entferne sie.
-
-
-
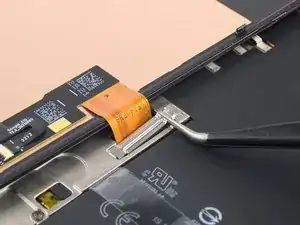
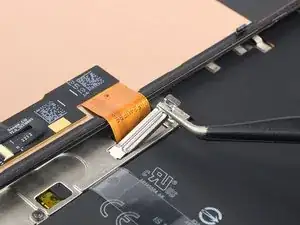
Heble den Displaykabelstecker mit einem Spudger senkrecht nach oben aus seinem Anschluss heraus und trenne das Displaykabel ab.
-
-
-
Löse das Display vom Smartphone ab.
-
Wenn du beim Zusammenbau vorgeschnittene Klebestreifen verwendest, dann folge dieser Anleitung.
-
Wenn du beim Zusammenbau vorgestanzte Klebefolien verwendest, dann folge dieser Anleitung.
-


Vergleiche das Ersatzteil mit dem Originalteil. Eventuell musst du fehlende Teile übertragen oder Schutzfolien vom Neuteil abziehen, bevor du es einbauen kannst.
Um dein Gerät wieder zusammenzubauen, folge den Schritten dieser Anleitung in umgekehrter Reihenfolge.
Entsorge deinen Elektromüll sachgerecht.
Hat die Reparatur nicht ganz geklappt? Versuche es mit ein paar grundständigen Lösungen, ansonsten findest du in unserem Forum Hilfe bei der Fehlersuche.

28 Kommentare
To get the fingerprint scanner to work... Fingerprint scanner not working after replacing screen. Pixel 6 Pro
Phong Do -
After doing a few of these, using the fingerprint calibration tool is always needed. https://pixelrepair.withgoogle.com/udfps
I think it should be included in the final steps for completeness.
Also, the plastic bracket on the back of the screen usually is more willing to separate from the screen than from the phone chassis. I think this may lead to confusion for some people who may try to install the new screen over the old plastic. Some mention of this would be helpful.
All guides say we have to recalibrate the fingerprint sensor after a screen replacement by going here https://pixelrepair.withgoogle.com/udfps
Problem is that this does not work anymore. With a Pixel 7 Pro it says software failed to install. Looking at Android and Google forums is seems a common problem that broke this year. Is there another way to install the fingerprint calibration software on the phone without that link above??
I never change any mobile phone parts.
Should I try it?
Yes. It worked like a charm. I just followed the steps, and after calibrating the fingerprint sensor, everything was working 100%.