Einleitung

  1. KQAeJNIvdlpfV23F
    KQAeJNIvdlpfV23F
    fsVjGRMO2XdGIFsc
    QMjASJtHGFeSv1vN
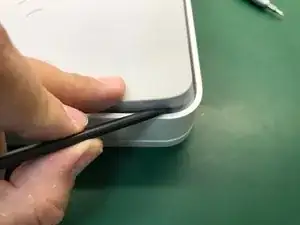
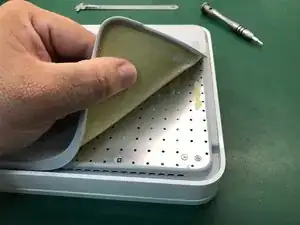
    • Wir legen das Gerät mit der Vorderseite nach unten und nehmen die untere Gummiabdeckung ab. Es ist besser, an einer Ecke zu beginnen.

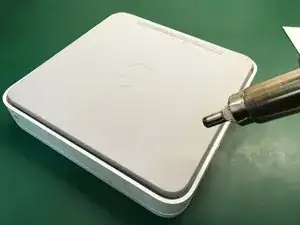
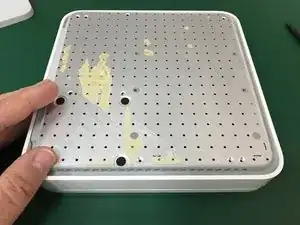
    • Wir erhitzen den Deckel, um ihn abnehmen zu können. Es braucht viel Klebstoff unter der gesamten Oberfläche. Seien Sie geduldig und sehr vorsichtig.

    The rubber tears real easy with age so carefully work your way inwards from each corner.

    AndreasT -

    Just happen to me :/

    Ben Capehart -

  2. aJjpOhVcUvTKADOk
    aJjpOhVcUvTKADOk
    J3OanBkVnRRxqm1P
    hY1Zt2cDQKQJfC2e
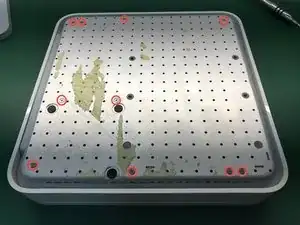
    • Wir entfernen die 10 Kreuzschlitzschrauben #00, die die untere Metallstütze der Time Capsule halten.

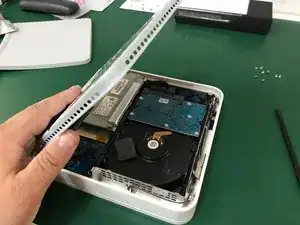
    • Wir öffnen nach links und lassen die Netzwerkanschlüsse auf dieser Seite. Nicht ganz öffnen, damit das Lüfterkabel nicht beschädigt wird.

    thanks for doing this guide.

    1. remove hash sign (#) before the 10. “Remove the 10 Phillips...

    2. second bullet - “Do not open all the way to avoid…

    Brian McNiff -

    I agree!

    Good Job!

    Ben Capehart -

  3. unywhdvB2nALZmrK
    unywhdvB2nALZmrK
    ZfKe1PqetIZKuxFB
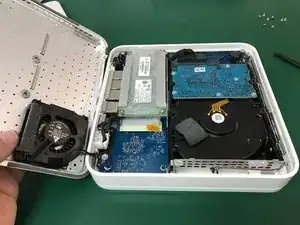
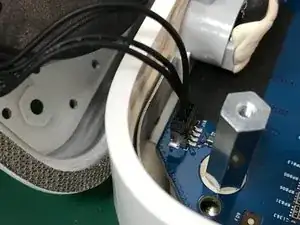
    • Löse vorsichtig mit der Spudgerspitze den Lüfteranschluss und entferne die metallene untere Abdeckung.

  4. mNNWHLuGvhMZIhUF
    mNNWHLuGvhMZIhUF
    HlHicyNmh6gihWKy
    rCWxwJ3UCM5bJZKp
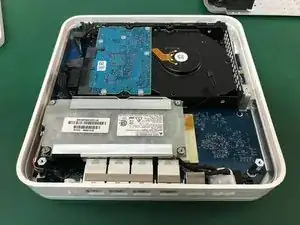
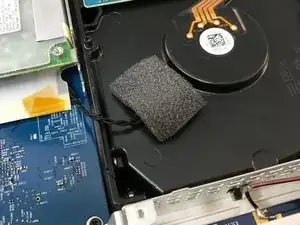
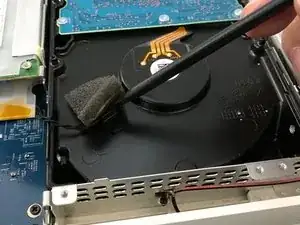
    • Wir können den Temperatursensor auf der Oberfläche der Festplatte beobachten.

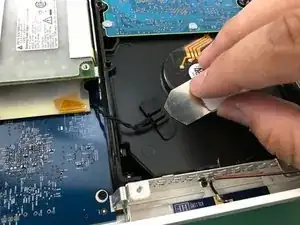
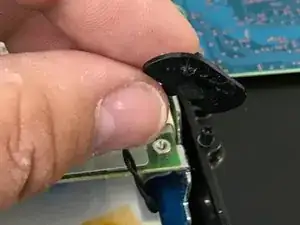
    • Wir ziehen vorsichtig das Klebeband ab, das den Temperatursensor bedeckt.

  5. wpgoqgLPFfQYiVUo
    wpgoqgLPFfQYiVUo
    6FyUqNnLPghjhUoT
    • Wir nehmen den Clip ab, der den Temperatursensor hält, und entfernen beide.

  6. MfB1jNiGjOiuDjPS
    MfB1jNiGjOiuDjPS
    Nv3C2WUxH3xQ53hA
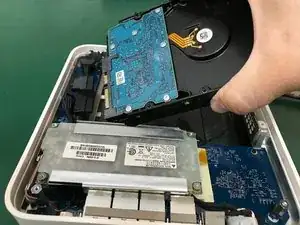
    • Wir heben die Festplatte ein wenig an, ohne zu stark zu ziehen, um die Strom- und Datenanschlüsse der Festplatte nicht zu beschädigen. Wir entfernen den Stromanschluss von der Festplatte

    • Wir entfernen den Datenstecker von der Festplatte.

  7. 4CVnxkRJXJNevBEU
    4CVnxkRJXJNevBEU
    UCsJxtCIxfSWDbgu
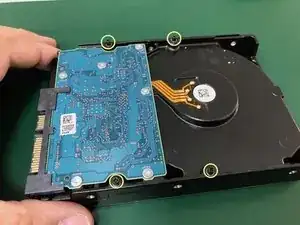
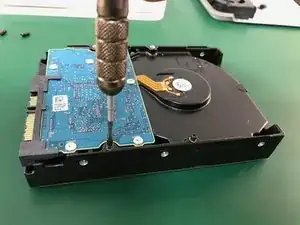
    • Sobald wir die Festplatte aus der Time Capsule haben, entfernen wir die 4 Säulen mit Phillips #00 Köpfen und legen sie in die neue Einheit.

    A #1 Philips works a lot better on these

    Heath Kehoe -

    Not gonna lie, I used a eye glasses repair kit screwdriver.

    kilereeds -

    Wow worked perfect! Thanks! But funny thing is I wanted to remove the hard drive to upgrade my Windows 11 Home PC and I just used dos kill disc to wipe it to 0’s

    kilereeds -

    Hello there, is this SATA II or SATA III HDD?

    Tomas Fiala -

Abschluss

Befolge die Anweisungen in umgekehrter Reihenfolge, um dein Gerät wieder zusammenzusetzen.

David Medrano

Mitglied seit: 22/12/13

1361 Reputation

11 Kommentare

I replaced a dead drive in about 30 mins following these instructions. The steps are clear, straight forward and the photos were extremely helpful. Many thanks as I now have a renovated AirPort Time Capsule.

Peter Long -

I just replaced the 2 TB WDC Green with a WD Red Pro 4 TB with this guide in less than 30 min. Except for the fan cable it was a cake walk.

Alex Senger -

Successfully upgraded my A1409 to a Western Digital - WD100PURZ - 5400 RPM Class SATA 6 Gb/s 256MB Cache 3.5. There are two additional steps: (a), there is a rubber strip around the original drive that reduces noise and protects the drive, gently remove from the original drive and place on the new drive; (b) once the rubber strip is on the drive, it is hard to get into place, angle the drive towards the connector side, and press in.

Brunob00 -

12 TB WD RED (inbuilt version WD120EMAZ) just confirmed for 1409 (G4 version).

you are welcome

AD G -

Hola. Reemplacé el disco con toda facilidad pero, desgraciadamente, la Utilidad AirPort no lo está reconociendo ni consigue borrarlo para activarlo. El HD nuevo es un WD Red de 10 TB. Si alguien puede ayudarme a resolver el problema, agradezco mucho.

I MM -

Hi. Is it possible to upgrade this to an SSD?

Bobby Barbour -

Yes, you could also use an SSD, just follow the same procedure.

Idrees -

How to Clone or Copy data to a new hard drive?

Ben Capehart -

4 TB WD Green drive replacement. 30 minutes start to finish, backup just started after formatting the disk. DO NOT forget to format the disk first. Disk format can be done from within the Airport Utility. Don't forget to remember that password!

jay Snoke -

It's not formatting the installed WD Red WD101EFAX which I've installed. Any help or suggestions?

Evgeny Kozlov -

Take it out then Try formatting it on Mac and then re-install it and try formatting again.

Ben Capehart -